ปัญหาหน้าฝน กลิ่นอับในบ้าน กำจัดอย่างไร เครื่องดูดความชื้นดีไหม
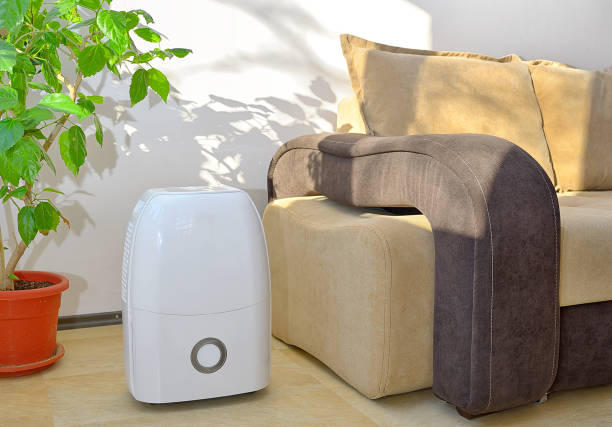
เมื่อเข้าสู่ฤดูฝน ปัญหาอย่างหนึ่งที่พบบ่อยคือกลิ่นอับภายในบ้าน หลายๆ บ้านเจอปัญหา กลิ่นอับหรือกลิ่นไม่พึงประสงค์

เมื่อเข้าสู่ฤดูฝน ปัญหาอย่างหนึ่งที่พบบ่อยคือกลิ่นอับภายในบ้าน หลายๆ บ้านเจอปัญหา กลิ่นอับหรือกลิ่นไม่พึงประสงค์
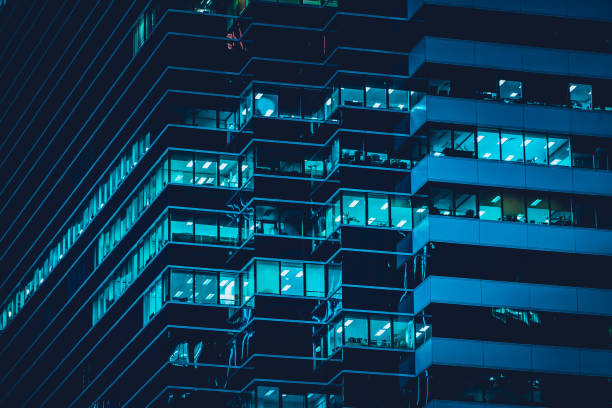
โรงแรมเป็นอีกหนึ่งสถานที่สำหรับพักอาศัยไม่ว่าจะเป็นการพักอาศัยแบบชั่วคราวหรือถาวร ซึ่งแต่ละแห่งล้วนมีการออกแบบและมีสไตล์ที่แตกต่างกัน เพื่อดึงดูดผู้ใช้บริการให้ได้มากที่สุด ในปัจจุบันอันเป็นยุคโควิดที่ถือได้ว่าเป็นวิกฤติเศรษฐกิจจึงทำให้ยากที่จะทำให้นักท่องเที่ยวเข้ามาพัก ฉะนั้นการสร้างจุดเด่นของโรงแรมอย่างการออกแบบจึงถือได้ว่ามีความสำคัญมาก บทความนี้จะมาพูดถึงการรับออกแบบโรงแรม ที่ทันสมัยและมีความสวยงามของผู้ให้บริการออกแบบที่เชื่อถือได้นั้นเป็นอย่างไร ผู้ให้บริการ รับออกแบบโรงแรม บริการอย่างไร บริษัทหรือผู้ที่บริการเกี่ยวกับการรับออกแบบโรงแรม นั้นจะมีอยู่หลากหลายให้เลือกลูกค้าที่ต้องการออกแบบโรงแรมได้ใช้บริการซึ่งผู้ประกอบการที่ทำธุรกิจโรงแรมหลาย ๆ คนล้วนมีความต้องการจะสร้างความสนใจแก่นักท่องเที่ยวให้เข้ามาพัก ไม่ว่าจะเป็นดีไซน์ที่ทันสมัย ความสวยงามของตัวโรงแรมทั้งภายนอกและภายใน และจุดาสนใจด้านอื่น ๆ จึงทำให้ต้องมีการเลือกผู้ออกแบบที่มีความเชี่ยวชาญและชำนาญอีกทั้งสามารถออกแบบได้ตรงตามต้องการ การออกแบบไม่เพียงแต่จะต้องให้สถาปนิกเป็นฝ่ายคิดแค่ฝ่ายเดียว แต่ทางผู้ว่าจ้างก็สามารถคิดออกแบบเองได้โดยให้สถาปนิกเป็นผู้ทำการออกแบบตามความคิดของผู้จ้างงาน ออกแบบโรงแรมอย่างไรให้มีความโดดเด่น การออกแบบโรงแรมที่ผู้ รับออกแบบโรงแรม ให้บริการนั้น จะมีทั้งออกแบบตามความคิดของสถาปนิกเอง หรือออกแบบตามที่ผู้ว่าจ้างคิด ผู้ประกอบการธุรกิจโรงแรมต่างก็อยากสร้างจุดเด่นของโรงแรมตนเองให้น่าสนใจและมีผู้เข้ามาพักมากยิ่งขึ้นโดยเฉพาะในช่วงสถาณการณ์วิกฤติทางเศรษฐกิจอันเนื่องมาจากโควิด 19 ที่แพร่ระบาดไปทั่วทุกมุมโลก โรงแรมที่ออกแบบจะต้องมีความสวยงาม แปลกใหม่ ทันสมัย มีความแหวกแนวไม่เหมือนใครและไม่สามารถลอกเลียนแบบได้ ไม่เพียงเท่านั้นยังต้องให้บริการที่ดี ครบวงจร ให้ความสะดวกต่อผู้เข้าพัก มีสภาพแวดล้อมที่ดี อยู่ท่ามกลางวิวทิวทัศน์ที่สวยงามน่าชม ผู้ให้บริการ รับออกแบบโรงแรม ที่เชื่อถือได้จะสามารถให้คำแนะนำหรือข้อเสนอแนะแก่ผู้จ้างได้อย่างเชี่ยวชาญ เพื่อความสวยงามและความทันสมัยของโรงแรม รวมถึงคุณภาพโรงแรมที่จะสร้างความเชื่อมั่นแก่ผู้เข้าพักอาศัยภายในโรงแรมทุกคน จะเห็นจากบทความทำให้หลาย ๆ คนที่มีธุรกิจโรงแรมได้รู้เกี่ยวกับความสำคัญของการออกแบบโรงแรมที่มีความแปลกใหม่ สวยงาม และมีความทันสมัย หากใช้บริการกับผู้ที่ รับออกแบบโรงแรม ที่เชื่อถือได้ก็จะส่งผลดีเป็นอย่างมากต่อผู้ใช้บริการออกแบบ เพราะจะทำให้ได้โรงแรมที่ตรงกับความต้องการและมีความทันสมัย แปลกใหม่ มีคุณภาพ […]
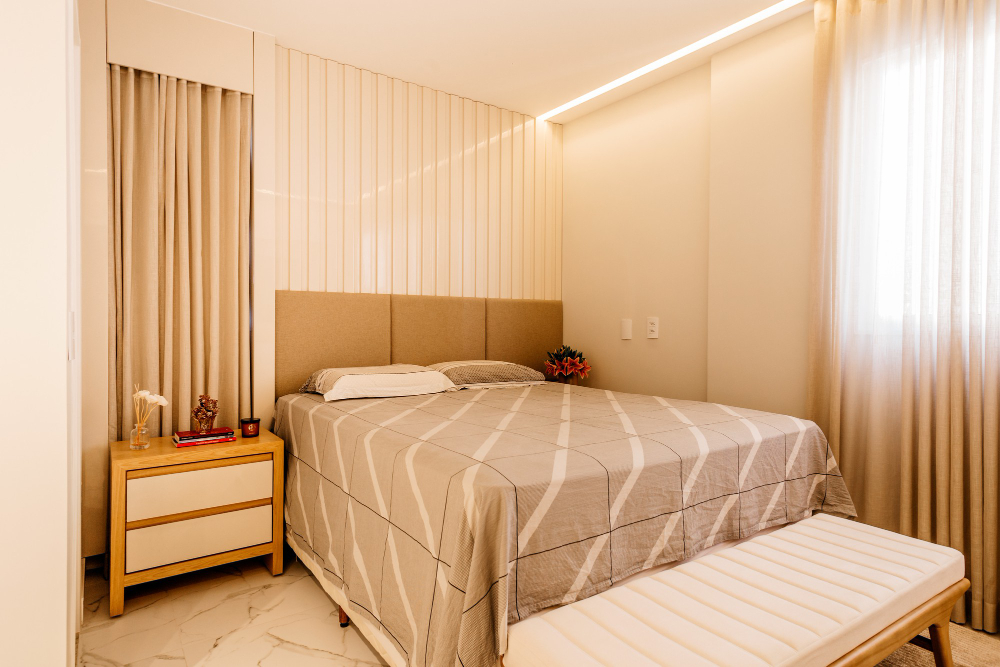
ถ้าคุณเป็นคนหนึ่งที่อยากมีห้องนอนในฝัน อยากได้ห้องที่เป็นมากกว่าห้องนอน แต่ไม่รู้จะเริ่มจากตรงไหนดี เราอยากให้คุณได้รู้จักกับ Instyledecoparis เพราะเราเป็นผู้เชี่ยวชาญด้านการออกแบบตกแต่งภายใน ไม่ว่าจะเป็นงานช่าง งานผนัง หรืองาน บิ้ว อิน ห้อง นอน ก็สามารถไว้ใจเราได้เพราะเราเป็นผู้เชี่ยวชาญมามากกว่า 10 ปี ในปัจจุบันคนเรามักใช้เวลาส่วนใหญ่อยู่บ้านมากขึ้น เนื่องด้วยสถานการณ์โควิด 19 ในปัจจุบันที่ทำให้วิถีชีวิตของคนในสังคมเปลี่ยนไป การอยู่ในที่ที่เป็นของเรา เหมือนเป็นการชาร์จแบตให้กับตัวเอง ดังนั้นหากคุณต้องการรีโนเวทบ้านควรเริ่มที่ห้องนอนเป็นอย่างแรก ตุณสามารถทำได้ง่ายๆด้วยการออกแบบตกแต่งด้วยห้องนอน อย่างเช่นงาน บิ้ว อิน ห้อง นอน ไม่ว่าจะเป็น โต๊ะ ตู้ เตียง เฟอร์นิเจอร์ต่างๆ สามารถเพิ่มฟังก์ชันการใช้งานได้ด้วยตัวคุณเอง โดยจะมีนักออกแบบของ Instyledecoparis ค่อยให้คำแนะนำทุกขั้นตอนก่อนเริ่มการสร้างงาน บิ้ว อิน ห้อง นอน ลูกค้าสามารถดูภาพ 3D ได้ก่อนสร้างจริง ทำให้ง่ายในการเข้าใจตรงกันระหว่างลูกค้า นักออกแบบ และช่าง ทำให้งานออกมาตอบโจทย์ลูกค้ามากที่สุด โดยเรามีความเชี่ยวชาญด้านการออกแบบ ติดตั้ง รวมถึงการผลิตผลงาน อย่างมีประสิทธิภาพอีกทั้งมีโรงงานในการผลิตเป็นของตนเอง มีบริการครบวงจร จบในที่เดียว […]
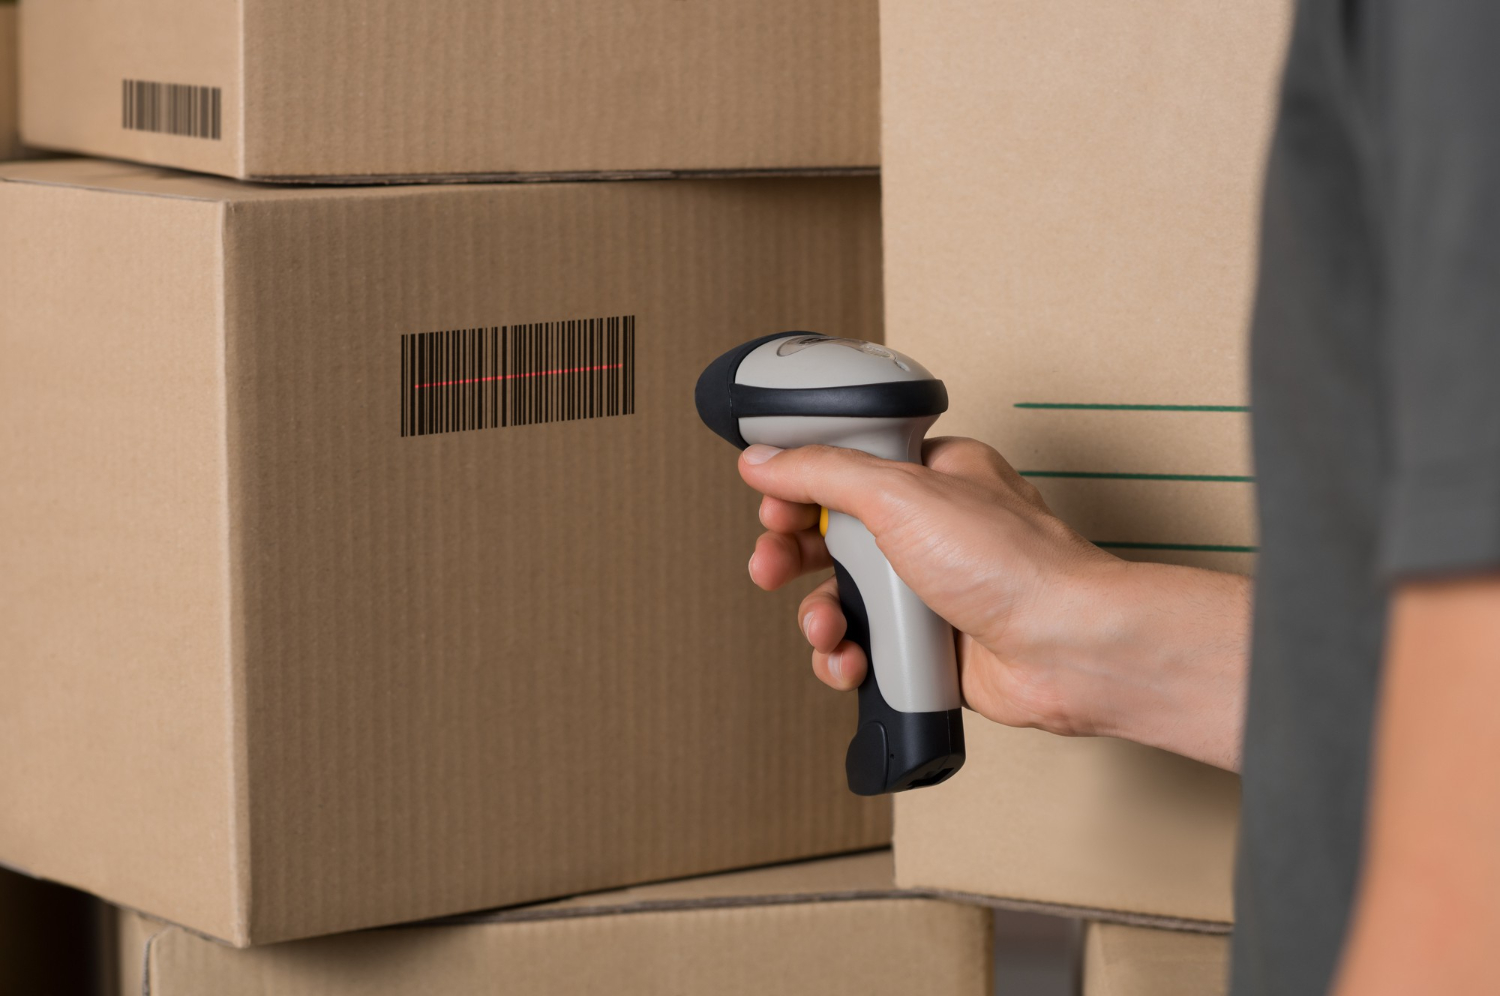
หากพูดถึง Barcode Scanner เรามักจะสามารถเห็นได้ทั่วไปตามร้านค้า อุตสาหกรรม หรือบริการต่าง ๆ ที่จะมีการสแกนเพื่อเก็บข้อมูลหรือใช้ในการคิดเงิน เรียกได้ว่าเป็นอีกหนึ่งอุปกรณ์สำคัญที่ใช้เป็นตัวกลางในการรวบรวมข้อมูลของสินค้าและบริการเอาไว้ บริษัทต่าง ๆ ที่มีความจำเป็นในการเก็บข้อมูลดังกล่าว จึงจะต้องมีการเลือกหรือรู้จักว่า อุปกรณ์ประเภทไหนที่เหมาะกับงานที่ทำมากที่สุด เพื่อให้สามารถทำงานได้อย่างคล่องตัวและมีคุณภาพมากยิ่งขึ้น 4 ประเภทของ Barcode Scanner ที่ได้รับความนิยมมากที่สุด เครื่องสแกนบาร์โค้ดที่ใช้ในปัจจุบันนั้นมีหลากหลายรูปแบบ ซึ่งก็จะมีฟังก์ชันการใช้งานที่แตกต่างกันไปตามวัตถุประสงค์การใช้งาน ซึ่งวันนี้เราจะมาทำความรู้จัก ประเภทของอุปกรณ์ชนิดนี้กัน เครื่องสแกนบาร์โค้ดแบบมีสาย สามารถพบเห็นได้คุ้นตาตามร้านสะดวกซื้อหรือห้างสรรพสินค้าทั่วไป โดยอุปกรณ์ชนิดนี้จะใช้สำหรับคิดเงินสินค้าด้วยการสแกนบาร์โค้ดที่ติดอยู่ที่สินค้า สามารถอ่านบาร์โค้ดได้ทั้ง 1D และ 2D ซึ่งมีความแม่นยำในการสแกนบาร์โค้ดค่อนข้างสูง เพื่อให้พนักงานสามารถใช้สแกนสินค้าได้อย่างรวดเร็ว ยังมีระบบกันสั่นและป้องกันน้ำอีกด้วย เครื่องสแกนบาร์โค้ดแบบไร้สาย Barcode Scanner ชนิดนี้ นอกจากจะสแกนได้ทั้ง 1D และ 2D แล้ว ยังสามารถอ่านบาร์โค้ด OCR ได้ด้วย จึงให้ความแม่นยำสูง ยกสแกนได้อย่างสะดวกเพราะไม่มีสายให้เกะกะ มีดีไซน์ที่ทันสมัย น้ำหนักเบา ซึ่งอุปกรณ์ชนิดนี้จะสามารถเห็นได้จาก ร้านค้า โลจิสติกส์ […]
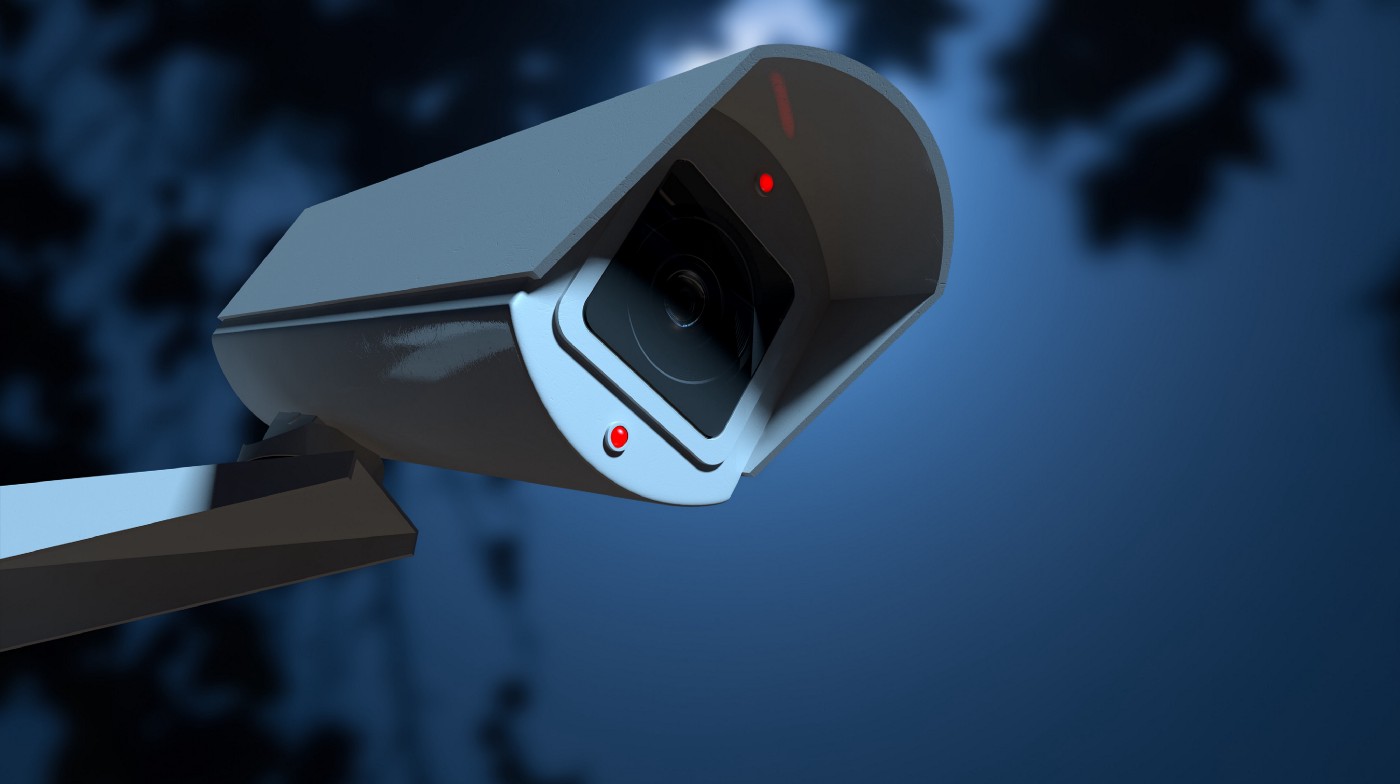
กล้องวงจรปิด (CCTV) คือ ระบบการบันทึกภาพเคลื่อนไหวที่ถูกจับภาพโดยกล้องวงจรปิด ที่ได้ติดตั้งตามบริเวณต่างๆ มายังเครื่องบันทึกภาพ และ ส่วนรับภาพดูภาพซึ่งเรียกว่า จอภาพ (Monitor) และบันทึกลงไปยังเครื่องบันทึก เป็นระบบสำหรับใช้เพื่อการรักษาความปลอดภัย หรือ ใช้เพื่อการสอดส่องดูแลเหตุการณ์หรือสถานการณ์ต่างๆ หากต้องการเพิ่มความปลอดภัยภายในบ้านหรือที่ทำงานของคุณให้มากยิ่งขึ้น ก็คงไม่มีทางไหนที่จะดีไปมากกว่าการลองมองหากล้องวงจรปิดมาติดตั้งไว้อย่างแน่นอน ถ้าใครยังไม่รู้ว่าจะเรื่องกล้องวงจรปิดตัวไหน มาดูไปพร้อมๆกันเลย Hi-View 3D 360° กล้องวงจรปิดที่สามารถช่วยคุณประหยัดงบประมาณในการติดกล้องวงจรปิดหลายตัว เพราะกล้องวงจรปิด Hi-View เนื่องจากมีเลนซ์มุมกว้าง 360 องศา พาโนราม่า สามารถรองรับการแสดงภาพแบบ Virtual Reality มองเห็นสิ่งต่างๆรอบด้าน ทำงานไร้สาย ด้วยการเชื่อมต่อ wifi หรือหาก wifi ไม่สามารถใช้งานได้ก็สามารถใช้ LAN แทน wifi ได้ กล้องมีความคมชัดระดับ HD (2048×1536 Pixel) เมมโมรี่ 32 GB มีไฟอินฟราเรด 3 ดวง สามารถควบคุมกล้องผ่านสมาร์ทโฟน APP : […]

หากถามว่าในแต่ละปีนั้น ผู้ที่มีรถยนต์ต้องหมดค่าใช้จ่ายไปกับอะไรบ้าง เชื่อได้เลยว่านอกจากค่าดูแลรักษารถยนต์ ค่าเติมน้ำมัน รวมทั้งค่าเบี้ยประกันรถยนต์ที่จำเป็นต่อการใช้รถมาก ๆ เพราะบนท้องถนนก็มีคนหลายรูปแบบ มีนิสัยการขับขี่ที่ไม่เหมือนกัน หรือในบางครั้งคราว อาจมีเหตุไม่คาดฝันเกิดขึ้น จนทำให้เกิดความเสียหายขึ้นกับตัวรถยนต์ ยังไม่รวมไปถึงในกรณีที่รถยนต์เสื่อมสภาพและต้องการการดูแลซ่อมแซมจากผู้เชี่ยวชาญ การมีความคุ้มครองจากประกันรถยนต์ก็จะเข้ามาช่วยดูแลเรื่องค่าใช้จ่ายต่าง ๆ ในส่วนนี้ได้ ซึ่งประกันรถยนต์นั้นก็มีหลากหลายรูปแบบความคุ้มครอง หรือที่มักจะเรียกกันว่า แผนประกัน นั่นเอง โดยคนที่มีงบประมาณมาก และมีความเสี่ยงสูง ก็อาจเลือกความคุ้มครองดี ๆ จากประกันชั้น 1 มาดูแล แต่สำหรับบางคนที่อาจจะมีงบน้อยลงมาหน่อย ก็อาจจะเลือกประกันชั้น 2 ที่ความคุ้มครองครอบคลุมเช่นกัน ราคาเบี้ยประกันก็จะลดลงด้วย แต่สำหรับใครที่คิดว่าต่อให้เลือกขอบเขตความคุ้มครองที่แคบลงมาเยอะแล้ว ก็ยังรู้สึกว่าอยากประหยัดเงินลงไปอีก เพราะต้องการรัดเข็มขัดและเก็บออมเงินให้มากขึ้น บทความนี้จะขอแนะนำวิธีง่าย ๆ ที่หลายคนอาจยังไม่รู้ จะมีอะไรบ้างลองเลื่อนลงมาอ่านเลย ประหยัดเบี้ยประกันชั้น 2 พร้อมรับความดูแลสุดคุ้ม ดูพฤติกรรมการใช้รถยนต์ของตนเอง เรียกได้ว่าเป็นสาเหตุสำคัญที่ส่งผลกับเบี้ยประกันเลยก็ว่าได้ กับเรื่องของพฤติกรรมการใช้รถยนต์นั่นเอง ไม่ว่าจะเป็นประกันรถยนต์ชั้น 1, ประกันชั้น 2 หรือประกันแบบอื่น ๆ คุณต้องเริ่มต้นจากการประเมินตนเองก่อนว่ามีพฤติกรรมการใช้รถยนต์อย่างไร และมีลักษณะการใช้งานรถยนต์เป็นอย่างไร เพราะสิ่งเหล่านี้มีผลต่อเงินที่คุณต้องจ่าย หากไม่ได้ประเมินตนเองมามากพอคุณก็อาจจะกำลังเลือกประกันรถยนต์ที่อาจจะไม่เหมาะกับคุณอยู่ก็เป็นได้ ดูสภาพรถยนต์ […]

Egg All Day เป็นอีกหนึ่งร้านอาหารสไตล์ Comfort Food ที่น่าสนใจและโด่งดัง ซึ่งขึ้นชื่อในเรื่องของไข่นุ่มสไตล์เกาหลีและโทสต์ที่มีความนุ่มฟูแบบสุด ๆ โดย Egg All Day Menu ต่าง ๆ นั้นการันตีความอร่อยได้ทุกเมนู แถมยังสามารถกดออนไลน์ เพื่อให้มาจัดส่งถึงคุณได้อย่างสะดวกในทุกสถานที่ จะทานมื้อไหนก็สั่งได้ทันใจ รวมสุดยอด Egg All Day Menu ที่อยากให้คุณลองสัมผัสไปด้วยกัน โทสต์แซนด์วิชไข่นุ่ม เมนูออริจินัลขึ้นชื่อของทางร้าน ด้วยคอนเซปต์ “ไข่นุ่มสไตล์เกาหลี” ที่หากใครที่มาครั้งแรกนั้นแนะนำว่าควรสั่งมาลองจริง ๆ เพราะสูตรของทางร้านใช้วัตถุดิบแบบ Home Made ทั้งหมด ทั้งตัวขนมปังบริยอชเข้มข้น ไข่ที่มีกลิ่นของเนยและไส้แบบแน่น ๆ ฉ่ำ ๆ เรียกได้ว่าทานแล้วอร่อยฟินสุด ๆ นอกจากนี้ทางร้านยังมีโทสต์อีกหลายหน้าให้เลือกตามความชอบได้ เช่น โทสต์แซนด์วิชไข่ไก่โชยุการ์ลิค โทสต์แซนด์วิชไข่หมูเผ็ดบูลโกกิ โทสต์แซนด์วิชไข่อโวคาโดซัลซ่า และหน้าอื่น ๆ ที่อร่อยทุกหน้า ข้าวผัดกิมจิ-หมู มาดูฝั่งเมนูข้าวกันบ้างโดยสำหรับใครที่เป็นสายอาหารเกาหลีหรือหมูผัดกิมจิเลิฟเวอร์นั้นเรียกได้ว่าต้องห้ามพลาดกับเมนูนี้เลยจริง ๆ […]

ในปัจจุบันนี้เรื่องของธุรกิจเกี่ยวกับไอทีนั้นก็เป็นอีกเรื่องหนึ่งที่เราเองก็จะต้องให้ความสนใจและความสำคัญกันอย่างที่สุด เราเองจะต้องรู้ว่าในการที่เราจะทำธุรกิจนั้นเราจะต้องทำธุรกิจเริ่มจากอะไรก่อนเป็นอันดับแรก ทุกๆอย่างในเรื่องของการทำธุรกิจนั้นต้องบอกเลยว่าเป็นเรื่องที่ดีแต่ถ้าหากเราอยากที่จะให้ความประสบความสำเร็จนั้นก็จะต้องมีการวางแผนในเรื่องของการตลาดก่อนจึงจะสามารถที่จะทำการขายได้ ทุกสิ่งทุกอย่างในเรื่องของการทำธุรกิจเกี่ยวกับไอทีถ้าหากเราอยากที่จะให้มีการเติบโตแล้วนั้นเราก็จะต้องวางแผนในเรื่องของระบบที่เราจะลงทุนก่อนเพราะว่าการที่เราลงทุนแล้วนั้นก็จะต้องทำให้ได้กำไรมากขึ้น ไม่มีใครหรอกที่ลงทุนไปแล้วอยากที่จะได้กำไรน้อยๆ เราจะต้องรู้จักที่จะเลือกบริษัทที่ให้ต้นทุนที่ต่ำกับเราเพื่อที่เราจะได้นำมาขายต่อได้ในราคาที่ไม่ได้แพงเพื่อที่ร้านที่ค้าส่งนั้นจะมาซื้อกับเราเพื่อไปขายต่ออีกที อันนี้จึงจัดว่าเป็นเรื่องที่ดีที่เราจะต้องให้การเรียนรู้ให้มากๆด้วยเพราะธุรกิจเกี่ยวกับไอทีนั้นก็จะมีการตกรุ่นไปมากมาย ถ้าหากเราไม่รู้จักที่จะวางแผนในการเลือกซื้อของมาลงขาย ทุนก็จะไปจมอยู่กับของที่เราซื้อมา บางครั้งขายไม่ออกก็ไม่มีเงินที่จะหมุนในแบบอื่นๆต่อไป เรื่องเหล่านี้จึงจัดว่าเป็นสิ่งที่ดีแล้วก็สำคัญอย่างมากเลย ที่เราเองก็จะต้องอย่ามองข้าม เพราะถ้าหากเรามองข้ามในเรื่องนี้ไปแล้วจะไม่ใช่เรื่องที่ดีกับเรา เราเองก็อาจจะเสียสิทธิ์ของเราไปอีกด้วย หากเราอยากที่จะให้ธุรกิจของเรานั้นไปรอด เราเองก็จะต้องให้ความสำคัญกับเรื่องของรายรับ รายจ่าย และต้นทุนในการลงของมาขายต่อด้วยนั้นเอง สิ่งต่างๆนี้เป็นเรื่องที่ไม่ได้ยากจนเกินความสามารถเลย เราเองจึงควรที่จะต้องให้ความสำคัญอยู่เสมอเพราะทุกๆอย่างจะเติบโตไวแล้วรวดเร็วได้ก็จะต้องหาลู่ทางใหม่ๆอยู่เสมอเพื่อที่เราจะได้ทำธุรกิจได้อย่างประสบความสำเร็จอย่างที่สุดด้วย หากเราให้ความสำคัญมากพอแล้วเราก็จะรู้ว่าการทำธุรกิจให้เติบโตนั้นไม่ใช่เรื่องที่ยาก เราเองก็ควรที่จะต้องให้ความสนใจกับเรื่องของธุรกิจเกี่ยวกับไอทีด้วยจึงจะเป็นสิ่งที่ดีอย่างที่สุด ด้วยเหตุนี้เราเองก็ควรที่จะต้องให้ความสำคัญในเรื่องของการทำธุรกิจเกี่ยวกับไอทีด้วยเพราะถ้าเราให้ความสำคัญแล้วเราจะได้กำไรแล้วธุรกิจของเรานั้นโตต่อเนื่องอีกเช่นกันด้วย

อินเทอร์เน็ตเต็มไปด้วยเครื่องมือที่ยอดเยี่ยมที่ทำให้ชีวิตของเราง่ายขึ้น สำหรับใครที่ทำงานใน สายพัฒนาไม่ว่าจะเเบบออนไลน์หรือออฟไลน์ บทความนี้จะเป็นประโยชน์เเก่ตัวคุณเเน่นอน เพราะว่ามันจำเป็นต่อการทำงานเเละบทความยังนี้มุ่งเน้นโดยเฉพาะเกี่ยวกับการใช้เครื่องมืออิเล็ก ทรอนิกส์เราปฎิเสธไม่ได้เลยว่ามันจำเป็นจริงๆยิ่งโลกเราไม่ว่าอะไรก็เริ่มเปลี่ยนไปเป็นระบบคอมพิวเตอร์เเละออนไลน์เพราะฉะนั้นเราควรจะต้องเรียนรู้ไว้ มีอะไรบ้างมาดูกันเลย Atom Atom ได้รับการพัฒนาและเผยแพร่ในปี 2014 โดย GitHub และได้รับการอธิบายว่าเป็นโปรแกรม แก้ไขข้อความที่แฮ็กได้ โดยมีขั้นตอนการทำงานที่ราบรื่นและใช้งานง่ายคุณลักษณะที่เปลี่ยนเกมของ มันคือความสามารถ ในการปรับแต่งพื้นที่ทำงานตามความต้องการและความต้องการของแต่ละบุคคล Sublime Sublime เป็นหนึ่งในโปรแกรมแก้ไขโค้ดข้อความที่ได้รับความนิยมมากที่สุด แม้ว่าคุณจะสามารถดาวน์ โหลด Sublime ได้ฟรี สำหรับใบอนุญาต Sublime เป็นข้ามแพลตฟอร์ม (Windows, MacOS, Linux) มีการนำทางที่รวดเร็วการจับคู่คำสั่งที่ปรับเปลี่ยนได้การแก้ไขพร้อมกันและ API ปลั๊กอินที่ใช้ Python Notepad Notepad เป็นโปรแกรมแก้ไขข้อความโอเพ่นซอร์สที่มีประสิทธิภาพซึ่งใช้งานได้กับ Windows เท่านั้น รองรับภาษาการเขียนโปรแกรม 27 ภาษานิพจน์ทั่วไปรองรับการแก้ไขและมุมมองที่ซิงโครไนซ์ การเน้น ไวยากรณ์และการพับและมีคุณสมบัติที่มีประโยชน์อื่น ๆ อีกมากมาย Vim Vimเป็นโปรแกรมแก้ไขข้อความที่กำหนดค่าได้ง่ายซึ่งช่วยให้สร้างและเปลี่ยนแปลงข้อความประเภทใดก็ได้ มาในตัวเป็น “vi” พร้อมกับระบบ UNIX ส่วนใหญ่และกับ Apple […]

โลกของเรานั้นเต็มไปด้วยเทคโนโลยีเเละทำงานด้วยระบบคอมพิวเตอร์ หรือ กอุปกรณ์อิเล็กทรอนิกส์ เครื่องจักรที่ทันสมัยทุกชิ้นมีรหัสเเละโค้ดต่างๆอยู่เเทบทุกอย่างหรือเเม้เเต่การใช้ชีวิตประจำวันเราสัง เกตไหมว่าทำไมทุกอย่างต้องมีโค้ด ที่ไว้สเเกนเเล้วเขาทำกันยังไง ทำไมข้อมูลถึงไปอยู่ใน โค้ดเล็กๆ ที่้เราเห็นกัน ทำไมต้องเป็นโค้ดหรือเรียกว่ารหัส ของสิ่งนั้นๆเเทบทุกๆที่มีการใช้ งานสำหรับเเบบนี้ วันนี้เราจึงอยากมา อธิบายเเละเป็นเเนวทางสำหรับ คนที่อยากจะทำโค้ดด้วยตัวเอง ทำยังไงกัน น้ามาดูกันเลย CODE คืออะไร? ถ้าเเปลเป็นไทยง่ายๆเลย code เเปลว่า รหัส เป็นภาษาที่คอมพิวเตอร์ทุกเครื่องพูดและเข้าใจได้ เมื่อนักเขียนโปรแกรมคอมพิวเตอร์เขียนโค้ดพวกเขาจะออกคำสั่งไปยังคอมพิวเตอร์ นักเขียนโค้ดคอม พิวเตอร์ใช้ภาษาโปรแกรมต่างๆเพื่อสื่อสารกับระบบเฉพาะ รหัสคอมพิวเตอร์ประกอบด้วยสตริง ของตัวอักษรตัวเลขและตัวเลขที่พิมพ์ซึ่งประกอบเป็นภาษาพร้อมด้วยกฎการสะกดและไวยากรณ์ ผู้ที่รู้วิธีการเขียนโปรแกรมหรือเขียนโค้ดทำให้มีโอกาสในการหางานเเละเป็นที่ต้องการของโลกอนาคตเป็นอย่างมาก รหัสนั้นมีไว้ใช้สำหรับกิจกรรมที่หลากหลาย ตั้งแต่การสร้างเว็บไซต์ไปจนถึงเครื่องบิน อะไรก็ได้ที่คุณสามารถทำได้ที่เกี่ยวข้องกับการทำงานของคอมพิวเตอร์ ทำไมการเขียนCODE จึงสำคัญ? รหัสหรือCODE ปัจจุบันนั้นเป็นปัจจัยหลักในการใช้สำหรับเว็บไซต์ รถยนต์ โทรทัศน์ โทรศัพท์มือถือ เครื่องบิน เครื่องเล่นเกม และผลิตภัณฑ์อื่นๆ จะเห็นได้ว่าเเทบจะทุกอย่างบนโลกของเราที่เราใช้ ในชีวิตประจำวันเลย ความต้องการนักเขียนโค้ดคอมพิวเตอร์ที่มีทักษะสูงยังคงเพิ่มขึ้นอย่างต่อ เนื่องเนื่องจากบริษัทต่างๆนั้นผลิตสินค้าหรือสินค้าที่ติดตั้งจากระบบคอมพิวเตอร์นั้นมากขึ้น เพื่อให้ทันกับความต้องการสินค้าที่ใช้คอมพิวเตอร์ เพราะฉะนั้น ผู้ผลิตจำเป็นต้องมีผู้เขียนโค้ดที่ เป็นนวัตกรรมและทุ่มเทเพื่อเขียนโค้ดคุณภาพสำหรับผลิตภัณฑ์ใหม่ ระบบคอมพิวเตอร์ช่วย […]